How to Create and Secure PDFs in Python with FastAPI
15 min read

By David Muraya • October 11, 2025
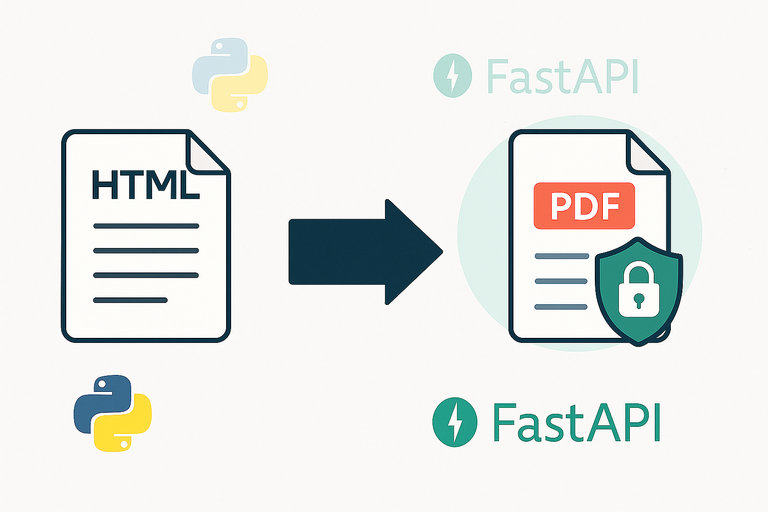
Generating documents like invoices, receipts, or reports is a common requirement in web applications. While you could manually create them, automating the process saves time and reduces errors. This guide explains how to generate dynamic PDFs from HTML templates, secure them with passwords and permissions, and serve them using FastAPI.
We will use a few key libraries:
- Jinja2 to create dynamic HTML templates.
- WeasyPrint to convert HTML to PDF.
- pypdf to encrypt the PDF and set permissions.
- FastAPI to serve the final document.
The Process: From Data to a Secure PDF
Our goal is to take some data (like invoice details), insert it into an HTML template, convert that HTML to a PDF, and then apply security settings before sending it to the user.
The flow looks like this:
- Create an HTML template with placeholders for dynamic data.
- Load the template and inject data into it using Jinja2.
- Convert the rendered HTML into a PDF in memory using WeasyPrint.
- Encrypt the in-memory PDF with a password and set metadata using pypdf.
- Serve the final PDF bytes using a FastAPI endpoint.
Step 1: Generating a PDF from an HTML Template
First, we need a way to convert an HTML string into a PDF. WeasyPrint is excellent for this because it has good support for modern CSS.
# filepath: converters.py from weasyprint import HTML async def html_to_pdf(html_string: str) -> bytes: """Converts an HTML string to a PDF bytes object.""" return HTML(string=html_string).write_pdf()
Now, let's create a function that populates an HTML template with data. A common use case is embedding images like a company logo directly into the HTML. We can do this by base64 encoding the image and including it in the template data.
# filepath: pdf_utils.py
import base64
from jinja2 import Template
from .converters import html_to_pdf

async def create_invoice_pdf(invoice_data: dict) -> bytes:
    """
    Generates a PDF invoice from an HTML template and data.
    """
    # Encode logo image to base64
    with open("static/logo.png", "rb") as image_file:
        encoded_logo = base64.b64encode(image_file.read()).decode("ascii")

    # Load the HTML template
    with open("templates/invoice_template.html") as f:
        template_str = f.read()

    # Add the encoded image to our data dictionary
    template_data = invoice_data.copy()
    template_data["encoded_logo_image"] = encoded_logo

    # Render the template with data
    template = Template(template_str)
    html_content = template.render(**template_data)

    # Convert the rendered HTML to a PDF
    pdf_bytes = await html_to_pdf(html_string=html_content)

    return pdf_bytes
Your invoice_template.html would then use the encoded image and data placeholders like this:
<!DOCTYPE html>
<html lang="en">
  <head>
    <meta charset="UTF-8" />
    <title>Invoice Template</title>
    <style>
      body {
        font-family: "Helvetica", "Arial", sans-serif;
        margin: 40px;
        font-size: 12px;
        color: #333;
      }
      .container {
        width: 100%;
        max-width: 800px;
        margin: auto;
      }
      .header {
        display: flex;
        justify-content: space-between;
        align-items: flex-start;
        margin-bottom: 40px;
      }
      .company-details {
        text-align: right;
      }
      .logo {
        max-width: 150px;
      }
      .invoice-details {
        text-align: right;
        margin-bottom: 40px;
      }
      .billing-details {
        margin-bottom: 40px;
      }
      .items-table {
        width: 100%;
        border-collapse: collapse;
        margin-bottom: 40px;
      }
      .items-table th,
      .items-table td {
        border: 1px solid #ddd;
        padding: 8px;
        text-align: left;
      }
      .items-table th {
        background-color: #f2f2f2;
        font-weight: bold;
      }
      .totals-table {
        width: 30%;
        margin-left: auto;
        border-collapse: collapse;
      }
      .totals-table td {
        padding: 8px;
      }
      .footer {
        margin-top: 40px;
        text-align: center;
        font-size: 10px;
        color: #777;
      }
    </style>
  </head>
  <body>
    <div class="container">
      <div class="header">
        <div>
          <img src="data:image/png;base64,{{ encoded_logo_image }}" alt="Company Logo" class="logo" />
        </div>
        <div class="company-details">
          <strong>Your Company Inc.</strong><br />
          123 Business Rd.<br />
          Nairobi, Kenya.<br />
          contact@yourcompany.com
        </div>
      </div>

      <div class="invoice-details">
        <h2>INVOICE</h2>
        <p>
          <strong>Invoice Number:</strong> {{ invoice_number }}<br />
          <strong>Date:</strong> {{ date }}
        </p>
      </div>

      <div class="billing-details">
        <strong>Bill To:</strong><br />
        {{ customer_name }}<br />
        {{ customer_address }}<br />
        {{ customer_city }}, {{ customer_country }}
      </div>

      <table class="items-table">
        <thead>
          <tr>
            <th>Item</th>
            <th>Quantity</th>
            <th>Unit Price</th>
            <th>Total</th>
          </tr>
        </thead>
        <tbody>
          <!-- In a real application, you would loop through items here -->
          <tr>
            <td>{{ service_name }}</td>
            <td>{{ quantity }}</td>
            <td>{{ unit_price }}</td>
            <td>{{ total_price }}</td>
          </tr>
        </tbody>
      </table>

      <table class="totals-table">
        <tr>
          <td><strong>Subtotal:</strong></td>
          <td>{{ total_price }}</td>
        </tr>
        <tr>
          <td><strong>Tax (16%):</strong></td>
          <td>{{ tax }}</td>
        </tr>
        <tr>
          <td><strong>Total:</strong></td>
          <td><strong>{{ total_price_with_tax }}</strong></td>
        </tr>
      </table>

      <div class="footer">
        <p>Thank you for your business!</p>
        <p>Payment is due within 30 days.</p>
      </div>
    </div>
  </body>
</html>
Step 2: Securing the PDF with pypdf
Once we have the PDF as a bytes object, we can add security. With pypdf, we can encrypt the file with a user password, set an owner password, and restrict what users can do (like printing or copying text) using PDF access permissions.
Encrypting a PDF with a user-specific password is a common security measure, especially for sensitive documents. For example, banks often send statements as password-protected PDFs, where the password is a piece of information only the recipient would know, such as a portion of their account number or their ID number. This ensures that even if the file is intercepted, it remains unreadable to unauthorized individuals.
# filepath: pdf_utils.py
import io
from pypdf import PdfReader, PdfWriter
from pypdf.constants import UserAccessPermissions

async def secure_pdf(pdf_bytes: bytes, user_pass: str, owner_pass: str | None = None) -> bytes:
    """
    Secures a PDF with a password and sets permissions.
    """
    pdf_stream = io.BytesIO(pdf_bytes)
    reader = PdfReader(pdf_stream)
    writer = PdfWriter()

    # Copy all pages from the original PDF
    for page in reader.pages:
        writer.add_page(page)

    # Add metadata
    writer.add_metadata({
        "/Author": "Your Company",
        "/Title": "Invoice",
    })

    # Encrypt the PDF and set permissions
    writer.encrypt(
        user_password=user_pass,
        owner_password=owner_pass,
        permissions_flag=UserAccessPermissions.PRINT
    )

    # Write the secured PDF to a new in-memory stream
    secured_stream = io.BytesIO()
    writer.write(secured_stream)
    secured_stream.seek(0)

    return secured_stream.getvalue()
In this function, user_password is what a user needs to open the file. owner_password allows for editing the document or changing its permissions. For production, the owner_password should be treated as a secret and managed securely using a tool like Google Secret Manager. By setting permissions_flag to UserAccessPermissions.PRINT, we only allow users to print the document - they cannot copy text or modify it.
When you open a password-protected PDF in a viewer like Adobe Acrobat Reader, you'll see that the document properties reflect the applied security restrictions. Below is a screenshot showing the security tab for a PDF generated and encrypted using the approach described above:

Step 3: Serving the PDF with a FastAPI Endpoint
Finally, we need an endpoint to trigger this process and return the file. Since our PDF is generated in memory, we use FastAPI's StreamingResponse. This is more efficient than saving the file to disk first.
# filepath: main.py
from io import BytesIO
from fastapi import FastAPI, HTTPException
from fastapi.responses import StreamingResponse
from .pdf_utils import create_invoice_pdf, secure_pdf

app = FastAPI()

@app.get("/invoices/{invoice_id}/download")
async def download_invoice(invoice_id: int):
    # In a real app, you would fetch this data from your database
    invoice_data = {
        "invoice_number": f"INV-{invoice_id}",
        "customer_name": "John Doe",
        "customer_address": "123 Customer Lane",
        "customer_city": "Nairobi",
        "customer_country": "Kenya",
        "service_name": "Service A",
        "quantity": 1,
        "unit_price": "100.00",
        "total_price": "100.00",
        "tax": "16.00",
        "total_price_with_tax": "116.00",
        "date": "2025-10-20",
    }

    # Generate the PDF
    pdf_bytes = await create_invoice_pdf(invoice_data)

    # Secure the PDF with a password (e.g., the invoice number)
    password = f"INV-{invoice_id}"
    secured_pdf_bytes = await secure_pdf(pdf_bytes, user_pass=password)

    filename = f"Invoice-{invoice_data['invoice_number']}.pdf"
    headers = {"Content-Disposition": f"attachment; filename=\"{filename}\""}

    return StreamingResponse(BytesIO(secured_pdf_bytes), headers=headers, media_type="application/pdf")
This endpoint ties everything together. It generates the PDF, secures it, and streams it back to the user with the correct headers to trigger a download.
Setup Notes
To use WeasyPrint for PDF generation, you need some extra system libraries.
On Windows: You must install GTK3 Runtime. Download the GTK installer from the GTK website.
In Docker: You need a multi-stage build. The first stage (builder) installs build dependencies and Python packages, while the second stage (final image) installs only the runtime libraries needed for WeasyPrint.
# Stage 1: Builder
# This stage installs build dependencies and Python packages
FROM python:3.13-slim AS builder

WORKDIR /opt/app_build

# Install OS build dependencies required for some Python packages (e.g., gcc for C extensions, libffi-dev)
RUN apt-get update && \
    apt-get install -y --no-install-recommends \
    gcc \
    libffi-dev \
    && rm -rf /var/lib/apt/lists/*

# Install Python dependencies here (example)
# COPY requirements.txt .
# RUN pip install --prefix=/install -r requirements.txt

# Stage 2: Final image
FROM python:3.13-slim

WORKDIR /app

# Install runtime OS dependencies for WeasyPrint (Pango, Cairo, GDK-Pixbuf, etc.)
RUN apt-get update && \
    apt-get install -y --no-install-recommends \
    libglib2.0-0 \
    libpango-1.0-0 \
    libpangoft2-1.0-0 \
    libharfbuzz0b \
    libcairo2 \
    libpangocairo-1.0-0 \
    libgdk-pixbuf2.0-0 \
    && rm -rf /var/lib/apt/lists/*

# Copy the virtual environment (with installed packages) from the builder stage
COPY --from=builder /opt/venv /opt/venv

# Add the virtual environment's bin directory to the PATH for the runtime stage
ENV PATH="/opt/venv/bin:$PATH"

# Copy your application code
COPY ./app /app

# Set environment variable for Python (good practice for running in containers)
ENV PYTHONUNBUFFERED=1

# Step 4: Run the web service on container startup using gunicorn webserver.
# This command is suitable for Google Cloud Run, which sets the $PORT environment variable.
# CMD exec gunicorn --bind :$PORT --workers 1 --worker-class uvicorn.workers.UvicornWorker app.main:app
These libraries are required for WeasyPrint to create and render PDFs correctly. If you skip this step, PDF generation will fail with missing library errors.
I have discussed multi-stage Docker builds in more detail in my Slimmer FastAPI Docker Images with Multi-Stage Builds.
FAQ
1. Why use WeasyPrint instead of other libraries? WeasyPrint offers excellent support for modern HTML and CSS, making it easier to create complex, well-designed layouts compared to older libraries. It translates what you see in a web browser into a PDF more accurately.
2. How do I handle custom fonts?
You can use CSS @font-face rules in your HTML template just like you would on a website. Ensure the font files are accessible to the WeasyPrint process, either via a URL or a local file path.
A better method is to link to web fonts (like Google Fonts) directly in your HTML template's <head> section.
<!DOCTYPE html>
<html lang="en">
  <head>
    <meta charset="UTF-8" />
    <title>Invoice Template</title>
    <link rel="preconnect" href="https://fonts.googleapis.com" />
    <link rel="preconnect" href="https://fonts.gstatic.com" crossorigin />
    <link
      href="https://fonts.googleapis.com/css2?family=Open+Sans:wght@400;700&display=swap"
      rel="stylesheet"
    />
    <style>
      body {
        font-family: "Open Sans", sans-serif;
      }
    </style>
  </head>
  <body>
    <!-- Your content here -->
  </body>
</html>
This works because WeasyPrint functions like a headless browser. It parses the HTML, sees the <link> tag, and fetches the font files from the specified URL before rendering the PDF. This allows you to use custom web fonts without needing to manage local font files on your server.
3. Is password protection enough for highly sensitive data? PDF password protection is a strong deterrent but can be broken with sufficient computing power. For highly sensitive information, consider additional security layers, such as delivering the file through an authenticated-only endpoint and logging all access attempts. You can learn more about implementing this in our guide to FastAPI authentication with JWT.
4. Why use StreamingResponse instead of FileResponse?
FileResponse is optimized for streaming files that already exist on disk. Since we are generating the PDF entirely in memory, StreamingResponse is the correct choice. It takes an iterator (like a BytesIO object) and streams its content without ever writing to a temporary file, which is more efficient.
About the Author
About the Author
David Muraya is a Solutions Architect specializing in Python, FastAPI, and Cloud Infrastructure. He is passionate about building scalable, production-ready applications and sharing his knowledge with the developer community. You can connect with him on LinkedIn.
Related Blog Posts
Related Blog Posts
Enjoyed this blog post? Check out these related posts!

How to Handle File Uploads in FastAPI
A Practical Guide to Streaming and Validating File Uploads
Read More...

Blocked by CORS in FastAPI? Here's How to Fix It
Solving Cross-Origin Errors Between Your Frontend and FastAPI
Read More...

How to Protect Your FastAPI OpenAPI/Swagger Docs with Authentication
A Guide to Securing Your API Documentation with Authentication
Read More...

A Practical Guide to FastAPI Security
A Comprehensive Checklist for Production-Ready Security for a FastAPI Application
Read More...
Contact Me
Contact Me
Have a project in mind? Send me an email at hello@davidmuraya.com and let's bring your ideas to life. I am always available for exciting discussions.