FastAPI Tutorial: A Complete Guide for Beginners
12 min read
By David Muraya • August 25, 2025
FastAPI is a modern Python web framework for building APIs. It's known for being fast, easy to use, and efficient. It uses standard Python type hints to validate data and automatically generate interactive documentation for your API. For more details on API design standards, see OpenAPI Specification.
This guide will walk you through everything you need to know to get started, from installation to building your first endpoints.
Why Use FastAPI?
FastAPI is built on two main components:
- Starlette: A lightweight ASGI (Asynchronous Server Gateway Interface) framework, which gives FastAPI its high performance.
- Pydantic: A data validation library that uses Python type hints to enforce data types.
This combination makes it simple to build APIs that are both fast and reliable.
Key Features of FastAPI
- Automatic Documentation: FastAPI automatically generates interactive API documentation using standards like OpenAPI (formerly Swagger) and ReDoc. This means you can test and explore your API directly from your browser.
- Python Type Hints: It uses standard Python type hints to define request and response models. This makes your code more readable and helps catch errors early. For more on type hints, see Python's typing module documentation.
- Data Validation: With Pydantic, FastAPI automatically validates incoming request data. If the data doesn't match the expected types, it returns a clear JSON error message.
- Asynchronous Support: It supports
asyncandawaitout of the box, allowing you to write non-blocking code that is great for I/O-heavy applications. For more on async programming in Python, see AsyncIO documentation. - Dependency Injection: It has a simple but powerful dependency injection system that helps you write modular and testable code. For example, you can define a dependency that provides a database connection, and FastAPI will handle passing it to your route functions.
- Security: It provides tools for common security schemes like OAuth2 and JWT tokens.
Installation and Setup
To get started, you need Python 3.8 or newer.
-
Install FastAPI: Use
pipto install the FastAPI library. For more on Python packaging, see Python Packaging User Guide.pip install fastapi -
Install an ASGI Server: FastAPI needs an ASGI server to run. Uvicorn is the recommended choice.
pip install "uvicorn[standard]"
Creating a Simple API
Let's create a basic API that returns a "Hello, FastAPI!" message.
Save this code in a file named main.py:
from fastapi import FastAPI

# Create a FastAPI application instance
app = FastAPI()

# Define a route for the root URL ("/")
@app.get("/")
def read_root():
    return {"message": "Hello, FastAPI!"}
Explanation:
app = FastAPI()creates your application.@app.get("/")is a decorator that tells FastAPI that the function below it handlesGETrequests for the root URL (/).
Now, run the application from your terminal:
uvicorn main:app --reload
The --reload flag tells Uvicorn to automatically restart the server whenever you change your code. While this command works well, FastAPI also provides a simpler command-line tool. For a more convenient way to run your app during development, see my guide on the FastAPI CLI.
Open your browser and go to http://127.0.0.1:8000. You should see the following JSON response:
{"message": "Hello, FastAPI!"}
Structuring Your FastAPI Project
While a single main.py file is great for getting started, real applications benefit from a more organized structure. A common approach is to separate different parts of your API into "routers."
Here is a simple project layout:
/myproject
├── app/
│   ├── __init__.py
│   ├── main.py
│   └── routers/
│       ├── __init__.py
│       └── items.py
└── requirements.txt
app/main.py: This is where you create your mainFastAPIapp instance and include routers from other files.app/routers/: This directory holds different parts of your API. For example,items.pywould contain all routes related to items.
This keeps your code clean and modular as your application grows. For more on organizing Python projects, see Python Application Layouts.
Path and Query Parameters
You can easily add parameters to your routes.
Path Parameters
Path parameters are part of the URL path.
# In main.py

@app.get("/items/{item_id}")
def read_item(item_id: int):
    return {"item_id": item_id}
Here, {item_id} is a path parameter. The type hint item_id: int tells FastAPI to validate that the input is an integer. If you visit http://127.0.0.1:8000/items/5, you'll get a valid response. If you visit http://127.0.0.1:8000/items/foo, FastAPI will return an automatic validation error.
Query Parameters
Query parameters are key-value pairs that come after the ? in the URL.
# In main.py

@app.get("/users/")
def read_user(user_id: int, name: str | None = None):
    return {"user_id": user_id, "name": name}
Any function parameter that is not part of the path is automatically treated as a query parameter. Here, user_id is required, while name is optional.
You can call this endpoint like this: http://127.0.0.1:8000/users/?user_id=10&name=David.
Handling Errors
FastAPI automatically handles validation errors, but you'll often need to return custom errors from your application logic. You can do this using HTTPException.
from fastapi import FastAPI, HTTPException

app = FastAPI()

items = {"foo": "The Foo Wrestlers"}

@app.get("/items-db/{item_id}")
def read_item_from_db(item_id: str):
    if item_id not in items:
        raise HTTPException(status_code=404, detail="Item not found")
    return {"item": items[item_id]}
If you try to access an item that doesn't exist (e.g., /items-db/bar), you'll get a clean 404 Not Found error with your custom message. For more on error handling, see FastAPI Error Handling documentation.
Request and Response Models
For POST, PUT, and PATCH requests, you typically send data in the request body. FastAPI uses Pydantic models to define the structure of this data. You can also use these models to define the shape of your response and change the default status code.
from fastapi import FastAPI, status
from pydantic import BaseModel

class Item(BaseModel):
    name: str
    price: float
    is_offer: bool | None = None

app = FastAPI()

@app.post("/items/", response_model=Item, status_code=status.HTTP_201_CREATED)
def create_item(item: Item):
    # Here you would typically save the item to a database
    return item
Here, we've done three things:
- Defined an
Itemmodel for the request body. - Used
response_model=Itemto ensure the response conforms to theItemschema. This is great for documentation and for filtering out extra data you don't want to return. - Set
status_code=status.HTTP_201_CREATEDto return a201status on successful creation, which is a standard REST API practice.
If you'd like to see a full CRUD example with FastAPI and a database, check out my article: Connecting FastAPI to a Database with SQLModel.
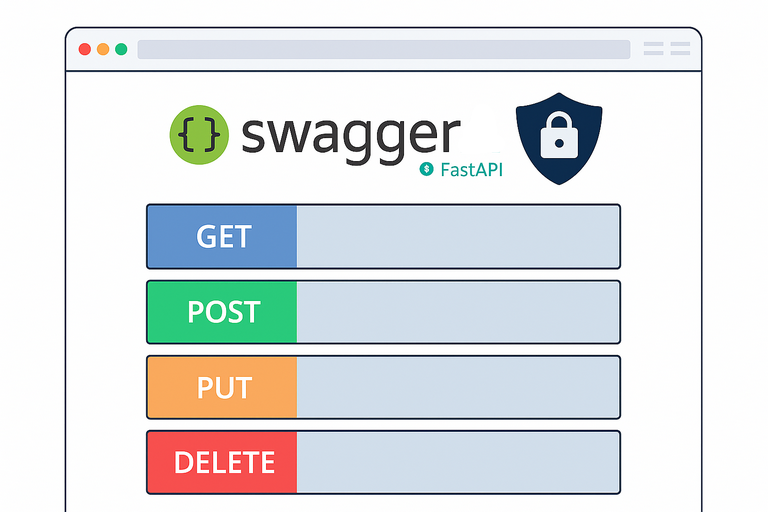
Interactive API Documentation
One of FastAPI's best features is its automatic documentation. While your app is running, go to these URLs:
http://127.0.0.1:8000/docs: This provides an interactive Swagger UI where you can see all your endpoints and test them directly.http://127.0.0.1:8000/redoc: This provides alternative documentation using ReDoc.
Advantages and Disadvantages
Advantages
- Easy to Learn: The syntax is simple and intuitive, especially if you know Python.
- High Performance: It's one of the fastest Python frameworks available, thanks to its async nature. See TechEmpower benchmarks for performance comparisons.
- Automatic Validation: Type hints provide robust data validation with clear error messages.
- Built-in Auth Tools: It has helpers for common authentication schemes.
- Good Middleware Support: You can easily add middleware for logging, authentication, and more.
Disadvantages
- Async Complexity: If you're new to
async/await, it can take some time to get used to. For a primer, see AsyncIO documentation. - Fewer Built-in Tools: Unlike Django, it doesn't come with an ORM or an admin panel. You have to choose and integrate these yourself.
- Smaller Ecosystem: While growing fast, it has fewer plugins and tutorials than older frameworks like Flask or Django.
Next Steps
This guide covers the basics. From here, you can explore more advanced topics to build production-ready applications:
- Configuration: Centralizing Your FastAPI Configuration Settings with Pydantic Settings
- Databases: Connecting FastAPI to a Database with SQLModel
- Database Migrations: Running Database Migrations with Alembic in Google Cloud Build
- File Handling: Handling File Uploads and File Downloads
- Middleware: 6 Essential FastAPI Middlewares for Production-Ready Apps
- Logging: How to Set Up Logging in FastAPI
- Background Tasks: Managing Background Tasks in FastAPI: BackgroundTasks vs ARQ + Redis
- Authentication: A Guide to Authentication in FastAPI with JWT
- Security: A Practical Guide to FastAPI Security and Protecting Your API Docs
- Docker: Slimmer FastAPI Docker Images with Multi-Stage Builds
- CI/CD: Simple CI/CD for Your FastAPI App with Google Cloud Build and Cloud Run
Conclusion
FastAPI is a powerful and modern framework for building APIs in Python. Its focus on speed, developer experience, and automatic documentation makes it a great choice for projects of any size.
FAQ
Q: Is FastAPI better than Flask or Django? A: It depends on your needs. FastAPI is faster and has built-in data validation and async support. Django is a "batteries-included" framework with an ORM and admin panel, making it good for larger, more traditional web applications. Flask is more minimalist and flexible.
Q: Do I have to use async with FastAPI?
A: No. You can use regular def functions for your routes, and FastAPI will run them in a thread pool. You only need async def if you are performing non-blocking I/O operations. For more on async in Python, see AsyncIO documentation.
Q: What is an ASGI server? A: ASGI (Asynchronous Server Gateway Interface) is a standard interface between async-capable Python web servers, frameworks, and applications. Uvicorn and Hypercorn are popular ASGI servers.
Q: How do I connect FastAPI to a database? A: The recommended way to work with SQL databases in FastAPI is to use SQLModel, which combines SQLAlchemy and Pydantic. It allows you to define your database models and API schemas in one place. You can then use FastAPI's dependency injection system to manage database sessions. For a complete walkthrough, see my guide on Connecting FastAPI to a Database with SQLModel.
Q: Where can I learn more? A: The official FastAPI documentation is an excellent and comprehensive resource.
About the Author
About the Author
David Muraya is a Solutions Architect specializing in Python, FastAPI, and Cloud Infrastructure. He is passionate about building scalable, production-ready applications and sharing his knowledge with the developer community. You can connect with him on LinkedIn.
Related Blog Posts
Related Blog Posts
Enjoyed this blog post? Check out these related posts!

A Practical Guide to FastAPI Security
A Comprehensive Checklist for Production-Ready Security for a FastAPI Application
Read More...
FastAPI CLI: The Simple Way to Run Your FastAPI Applications
Simplify Running Your FastAPI Applications with the Official FastAPI CLI
Read More...

Blocked by CORS in FastAPI? Here's How to Fix It
Solving Cross-Origin Errors Between Your Frontend and FastAPI
Read More...
How to Protect Your FastAPI OpenAPI/Swagger Docs with Authentication
A Guide to Securing Your API Documentation with Authentication
Read More...
On this page
On this page
Back to Blogs
Contact Me
Contact Me
Have a project in mind? Send me an email at hello@davidmuraya.com and let's bring your ideas to life. I am always available for exciting discussions.