Install ERPNext 16 on Windows (WSL): A Complete Development Guide in 2026
15 min read
By David Muraya • February 15, 2026
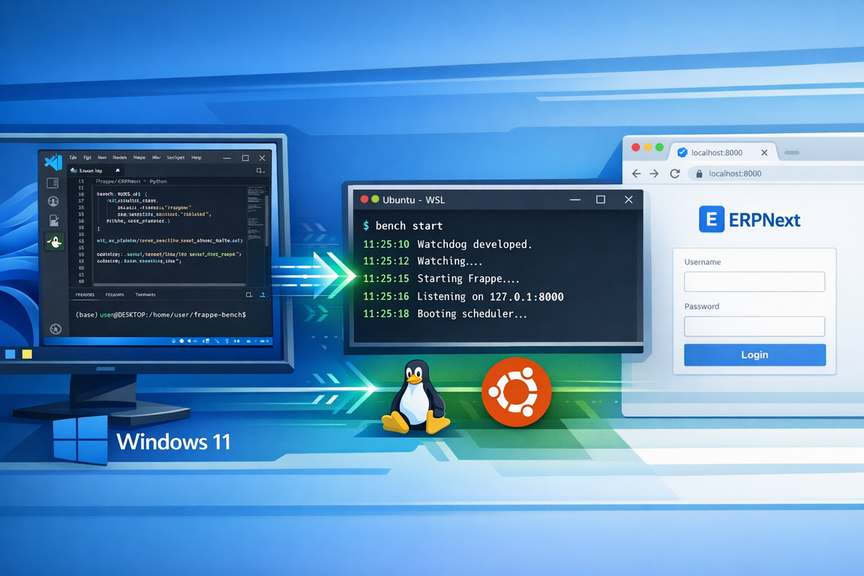
Developing for Frappe and ERPNext requires a Linux environment due to its heavy reliance on Redis, MariaDB, and Unix-specific Python libraries. Historically, this forced Windows developers to use slow Virtual Machines or dual-boot their systems.
With WSL 2 (Windows Subsystem for Linux), you can now run a full Ubuntu environment directly on Windows with near-native performance. This allows you to write code in VS Code on Windows while your app runs in a real Linux environment just like your production server.
This guide covers setting up a high-performance local development environment for ERPNext Version 16 on Windows 10/11 using Ubuntu 24.04 LTS. If you are looking to deploy to production, check out our guide on Installing ERPNext on Ubuntu 24 or Deploying ERPNext with Docker.
Phase 0: The Development Stack
We are building a "Hybrid" workflow:
- Windows: Hosts your browser, terminal (via Windows Terminal), and code editor.
- WSL (Ubuntu): Hosts the database, Python runtime, Redis, and the Bench CLI.
- VS Code Remote: Bridges the two, allowing you to edit files inside Linux as if they were local.
1. Enable WSL & Install Ubuntu 24.04
Open PowerShell as Administrator and run:
wsl --install Ubuntu-24.04
Restart your computer if prompted.
Launch "Ubuntu" from your Start menu and create your UNIX root username and password when prompted.
Tip: When creating your username, avoid using
rootoradmin. A standard name likedavidordeveloperis perfect.
2. Install VS Code & Extensions
To make this workflow seamless, you need:
- Visual Studio Code installed on Windows.
- The WSL Extension (by Microsoft) installed in VS Code.
This allows you to open any folder inside Ubuntu by typing code . in your terminal.
Phase 1: System Preparation (Inside WSL)
From this point on, all commands are run inside your Ubuntu terminal.
1. Update & Install Core Dependencies
We need the basic build tools, Git, and MariaDB database services.
sudo apt update && sudo apt upgrade -y && \
sudo apt install -y git redis-server mariadb-server mariadb-client \
pkg-config libmariadb-dev gcc build-essential nano curl
Phase 2: PDF Generation Support
ERPNext uses wkhtmltopdf (with patched Qt) to generate PDF reports. Since this package was dropped from Ubuntu 24 repositories, we install it manually. This ensures you can generate invoices and reports locally, a common requirement for ERP development.
Note: We move to the home directory first to ensure we have write permissions. The installation process might fail initially due to missing dependencies; running apt --fix-broken install resolves this, and then we install the package again to ensure it's fully set up.
cd ~ && \
# 1. Install libssl dependency (Required for legacy wkhtmltopdf)
wget http://archive.ubuntu.com/ubuntu/pool/main/o/openssl/libssl1.1_1.1.1f-1ubuntu2_amd64.deb && \
sudo dpkg -i libssl1.1_1.1.1f-1ubuntu2_amd64.deb && \

# 2. Download wkhtmltopdf
wget https://github.com/wkhtmltopdf/packaging/releases/download/0.12.6.1-3/wkhtmltox_0.12.6.1-3.jammy_amd64.deb && \

# 3. Install & Fix Dependencies
# This first attempt usually fails due to missing dependencies like xfonts-75dpi
sudo dpkg -i wkhtmltox_0.12.6.1-3.jammy_amd64.deb || sudo apt --fix-broken install -y && \

# 4. Final Install (Ensure it is fully configured)
sudo dpkg -i wkhtmltox_0.12.6.1-3.jammy_amd64.deb
Phase 3: Database Configuration
Developers often encounter issues with emoji support or strict mode in MariaDB. Let's configure it correctly from the start.
1. Apply Config
sudo tee /etc/mysql/mariadb.conf.d/99-frappe.cnf > /dev/null <<'EOF'
[mysqld]
character-set-client-handshake = FALSE
character-set-server = utf8mb4
collation-server = utf8mb4_unicode_ci

[mysql]
default-character-set = utf8mb4
EOF
Restart the service:
sudo systemctl restart mariadb
2. Secure & Set Root Password
Running mysql_secure_installation is recommended even for local dev to avoid permission issues later.
sudo mariadb-secure-installation
Follow the prompts (Set root password, remove anonymous users, remove test db).
Phase 4: Modern Python & Node Setup
For a stable development environment, we use nvm (Node Version Manager) and uv (Python manager). This allows you to switch versions easily if you work on multiple projects.
1. Install Node.js (via NVM)
We recommend installing Node using nvm (Node Version Manager) to manage versions easily. While modern Frappe setups (Version 16) perform best with Node 24, managing multiple versions is often necessary.
# Install NVM
curl -o- https://raw.githubusercontent.com/nvm-sh/nvm/v0.40.3/install.sh | bash && \
# Close and reopen terminal, or source the config
source ~/.bashrc && \
# Install Node 24
nvm install 24 && \
nvm use 24 && \
nvm alias default 24 && \
# Verify version (Should be v24.x.x)
node -v && \
# Update NPM (Recommended)
npm install -g npm@latest && \
# Install Yarn
npm install -g yarn
2. Install Python 3.14 & Bench (via UV)
We use uv to manage Python versions without messing with the system Python. uv is significantly faster than pip and handles virtual environments automatically.
# Install uv
curl -LsSf https://astral.sh/uv/install.sh | sh && \
source ~/.bashrc && \

# Install Python 3.14
uv python install 3.14 && \
source ~/.bashrc && \
# Install Python 3.14
uv python install 3.14 && \
# Install Bench CLI
# Bench is the CLI tool for Frappe Framework: https://frappeframework.com/docs/user/en/bench
uv tool install frappe-bench --python python3.14 && \

# Confirm installation
bench --version
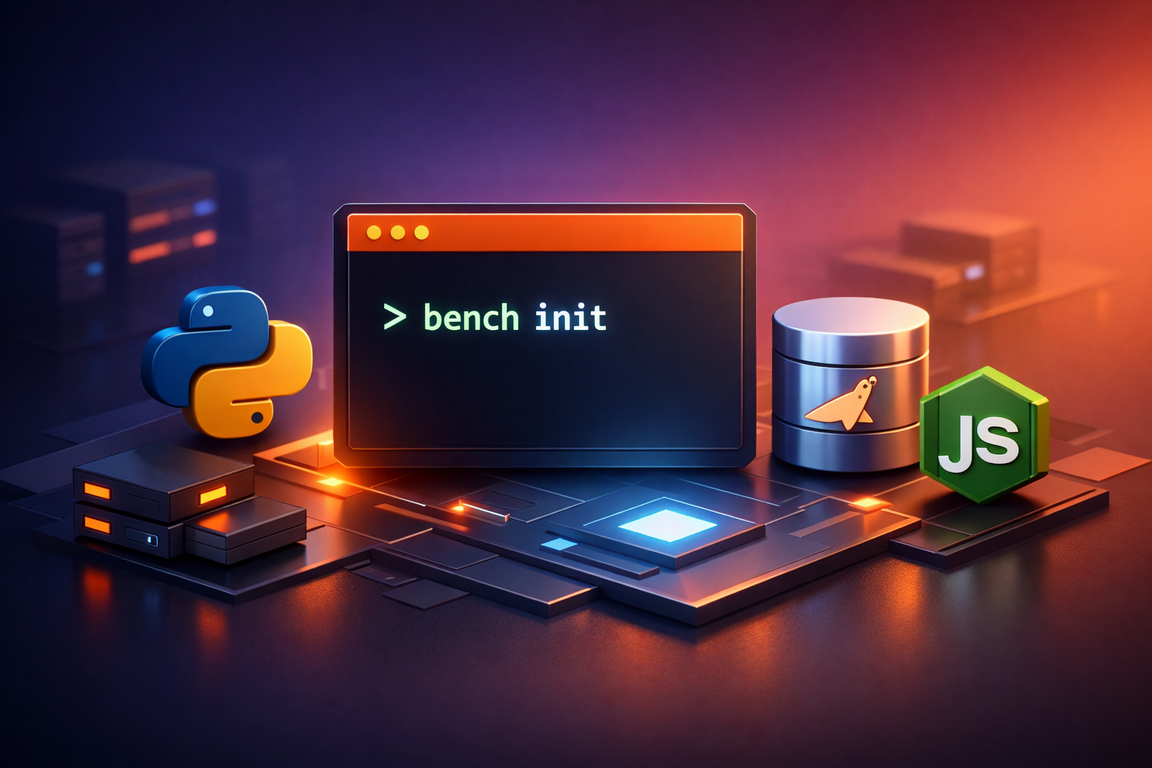
Phase 5: Initialize Your Bench
Now we create the folder that will hold all your apps and sites.
cd ~ && \
bench init frappe-bench --frappe-branch version-16 --python python3.14 && \
cd frappe-bench
Open in VS Code
Now is the perfect time to open your project in VS Code on Windows. Run:
code .
Note: If this is your first time, you will see a message saying "Installing VS Code Server". Let this finish. It installs a small helper inside Ubuntu that allows VS Code on Windows to talk to your Linux files seamlessly.
You will see VS Code open with a connection to WSL: Ubuntu. You can now edit files, use the integrated terminal, and use Git GUI tools directly.
Phase 6: Create a Local Site
In development, we map a site to localhost.
1. Get ERPNext
bench get-app --branch version-16 erpnext
2. Create Site
bench new-site dev.localhost --admin-password 'admin' --mariadb-root-password 'YourDBRootPassword'
3. Set as Default Site
This ensures the app loads when you visit localhost:8000.
bench use dev.localhost
4. Install App
bench --site dev.localhost install-app erpnext
4. Enable Developer Mode
When you are in application design mode and want changes in DocTypes, Reports, etc., to be written to the app repository (so they can be committed to Git), you must be in Developer Mode.
You can enable it via the CLI:
bench --site dev.localhost set-config developer_mode 1
Or manually by adding "developer_mode": 1 to your sites/dev.localhost/site_config.json.
After enabling it, clear the cache to apply changes immediately:
bench --site dev.localhost clear-cache
Note: Some apps require additional Node/Python dependencies to build and test in development mode. It is good practice to install them:
bench setup requirements --dev
Phase 7: Running the Server
To start your development server, run:
bench start
Open your browser in Windows and go to: http://localhost:8000.
Phase 8: Start Developing
Now that your development environment is set up, you are ready to start building.
We have a dedicated guide for Developing Custom Apps for ERPNext 16 which covers:
- Creating a new Custom App
- Version Control with Git
- Development Workflow (DocTypes, Fixtures, Patches)
- Testing and CI/CD Pipeline
Developer FAQ
1. How do I access the MariaDB database from a Windows GUI client?
Tools like DBeaver or HeidiSQL installed on Windows can connect to MariaDB inside WSL. Use localhost as the host, port 3306, and the credentials you set in Phase 3.
2. Why is my disk IO slow?
Crucial: Always store your project files inside the Linux filesystem (/home/your_username/...). Do not use /mnt/c/Users/.... Cross-OS file system access is very slow.
3. How do I debug Python code?
In VS Code connected to WSL, install the Python extension. You can then add a launch.json configuration to attach the debugger to the running bench process or run specific scripts.
4. Can I use Docker instead? Yes, but Docker on Windows adds a layer of abstraction that can make debugging code harder. This "Metal on WSL" approach is often preferred for core backend development because the code runs directly in the OS you are interacting with.
5. What should I do if bench start fails to start the server?
Check if ports 8000 (web) and 3306 (DB) are free. Run sudo netstat -tlnp | grep :8000 to check. Also, ensure Redis and MariaDB services are running with sudo systemctl status redis-server and sudo systemctl status mariadb. Restart WSL if needed.
6. How do I update ERPNext or my custom app?
For ERPNext: bench update --pull (from bench root). For your app: Pull latest changes in your app repo, then bench --site dev.localhost migrate and bench build. Always backup your site first with bench --site dev.localhost backup.
7. What's the difference between code-first and UI-first DocType creation? UI-first is easier for beginners (design in browser, export JSON). Code-first is better for version control (write JSON/Python manually, then migrate). Use UI-first for prototyping, code-first for production features.
8. How do I handle multiple developers working on the same app? Use Git branches for features. Each developer should have their own WSL bench. For shared development, consider a central bench server or use Docker for consistent environments. Always pull before pushing and resolve conflicts carefully.
9. Why are my changes not showing up after bench build?
Clear browser cache (Ctrl+F5) and check if assets are built correctly. Run bench clear-cache and restart the bench. Ensure your files are in the correct app directory and not overridden by site customizations.
10. How do I migrate from a Docker-based setup to WSL?
Create a backup of your Docker site using bench --site yoursite backup --with-files. Copy the backup files (SQL and public/private files) to your WSL instance. Create a new site in WSL, then restore using bench --site newsite restore /path/to/backup.sql.gz --with-public-files /path/to/public.tar --with-private-files /path/to/private.tar. Finally, install your custom apps and run bench migrate.
11. What are some performance tips for development?
Use bench start --concurrency 1 for lighter resource usage. Disable unnecessary apps on your dev site. Keep your WSL distro updated and avoid running too many services simultaneously. For large projects, consider increasing WSL memory allocation in .wslconfig.
12. How do I secure my development environment? Never commit secrets to Git. Use strong passwords for MariaDB. Limit WSL port exposure if needed. For production-like security, consider using separate VMs or cloud instances instead of local WSL for sensitive data.
13. Why are my JavaScript changes not reflecting?
Whenever you modify JavaScript files in your custom app (especially in public/js), you must rebuild the frontend assets. simply rely on bench migrate is not enough. You should run:
bench build --app your_app_name
to compile the changes.
About the Author
About the Author
David Muraya is a Solutions Architect specializing in Python, FastAPI, and Cloud Infrastructure. He is passionate about building scalable, production-ready applications and sharing his knowledge with the developer community. You can connect with him on LinkedIn.
Related Blog Posts
Related Blog Posts
Enjoyed this blog post? Check out these related posts!
How to Install ERPNext on Ubuntu 24 Using Bench
A manual, production-ready guide using UV and Python 3.14
Read More...
Mastering ERPNext 16 Development: The Complete Guide to Building Custom Apps
Build, Test, Deploy: A Modern CI/CD Pipeline for ERPNext Developers
Read More...
How to Install ERPNext on Ubuntu with Docker
A Complete Guide to Deploying ERPNext with Docker Compose, Nginx, and SSL
Read More...
Add Client-Side Search to Your Reflex Blog with MiniSearch
How to Build Fast, Offline Search for Your Python Blog Using MiniSearch and Reflex
Read More...
On this page
On this page
Back to Blogs
Contact Me
Contact Me
Have a project in mind? Send me an email at hello@davidmuraya.com and let's bring your ideas to life. I am always available for exciting discussions.